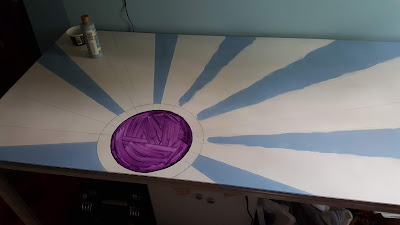
But first a set of images showing the painting from bare table and sketches to finished piece:
1. Assemble everything you'll need: resin kits, mixing buckets, mixing cups, plastic sheeting, blow torch, and stirring stick.
2. And here are some views of the final result:
I still have to paint the metal frame under it, but that's just some basic paint work.
Lessons Learned:
- Making and pouring resin is actually pretty easy.
- Make sure your work area is VERY WELL VENTILATED. The fumes from the mixed resin don't seem too bad at first. But even with both windows and the door open I got very light headed part way through and had to get out and get some air to recover.
- Make sure you have a bit more resin in your pour than the bare minimum. The top came out well coated but the edges are a bit thin and not as smooth. I used three kits, the bare minimum, but should have used four.
- For a wide area a smaller blowtorch is better. I bought a larger one with the idea that I had a larger area to cover and didn't want it to run out mid-project. However, in trying to reach the middle areas I had to tilt it too far over (the flame needs to be about 2-3"/50-75cm from the surface). The blowtorch needed to be upright and flamed out when tilted over where I needed it.
- You can actually use your breath as a source of CO2 rather than a flame, but be careful about breathing in those fumes!
- Keep an eye on the drips off the underside of the edges. I wiped the undersides three times with about a half hour wait between each wiping. Some videos suggested taping, etc. but I found wiping a couple times worked just fine.


No comments:
Post a Comment